
More than ever, it’s crucial to learn how to solder wires to connectors. Repairs of household appliances like dishwashers and refrigerators are increasingly being handled by homeowners. Electric teapots and other small appliances don’t have to be thrown away when they break down if you know how to solder. You can master soldering wires for repairs and enjoyable projects with a little perseverance and practice.
I have more appropriate learning how to solder a beginners guide here if you are new to soldering or want to learn about general soldering.
Table of Contents
Soldering Vs. Crimping Wires
Soldering
Using heated metal, also known as solder, to join two or more items is soldering. The components—a cable and a connector—are not heated, in contrast to welding. In contrast, the filler metal is only heated. It is placed between the wire and the connector as the solder warms up. The solder hardens as it cools, connecting the cable to the connector.
Some of the earliest recorded use of soldering date back to Mesopotamia more than 5,000 years ago, and it has been around for thousands of years. Since then, it’s been used in a wide range of settings, including jewelry manufacturing, computer repairs, stained glass creation, cookware, and cable connections.
Crimping
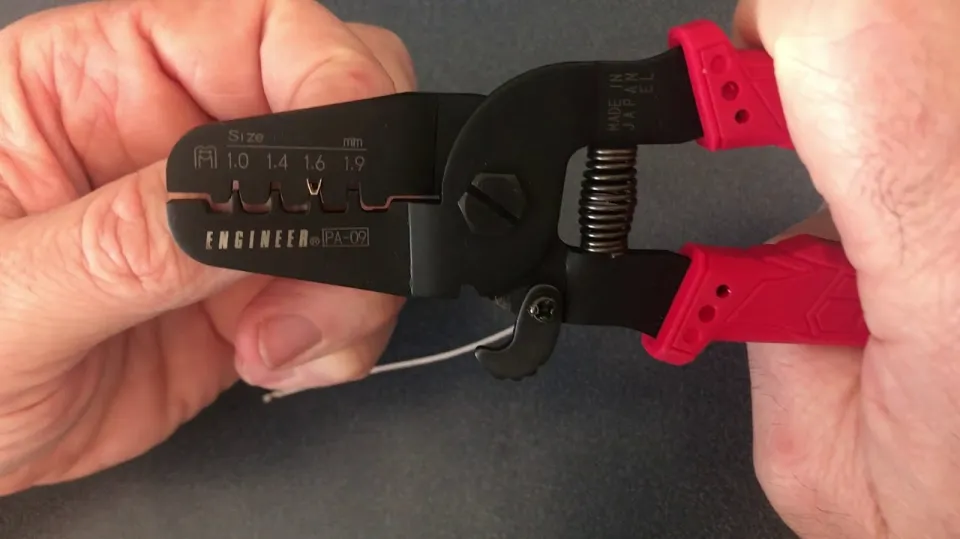
By using a specialized tool called a crimping tool, two cables are connected through the process of crimping. A connector should be inserted into the tool to connect two wires. After that, you must grasp the exposed wire and place it inside the connector. The connection between the connector and cable is then made when you squeeze the crimping tool’s handle.
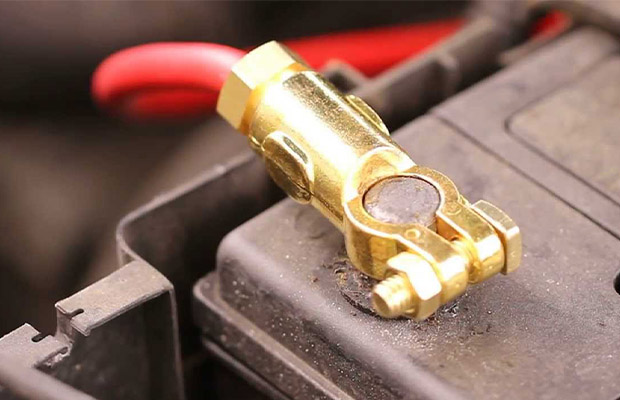
Crimping often yields a stronger and more enduring connection for cable connections than soldering. Crimping performs better than soldering for cable connections for a number of crucial reasons. The main justification for this is that when cable connections are crimped, an airtight seal is created between the cable and the connector, protecting them from moisture, dirt, and debris. The crimped cable won’t be exposed to moisture, dirt, or debris as a result. This level of security is not offered by soldering.
Electricians frequently concur that crimping is easier than soldering. Although soldering isn’t particularly challenging, it does require patience and accuracy when heated solder is positioned between the connector and the wire. An easier, more automated way to join the two components is by crimping. The crimping tool is filled with the cable and connection before being manually squeezed.
How Should I Solder A Connector To A Wire?
Remove The Old Connector
Remove the previous connection as a first step. A three-pronged EC3 connector is what it is. Either you can simply cut the wire off or you can remove the pins and desolder the wire. Just cut it off.
When cutting, avoid cutting the two wires simultaneously. It could be harmful if the blade unintentionally shortens the lipo.
After removing the connector, wrap the wire in a little heat shrink to prevent unintentionally shorting it.
Prepare The Wires
It’s time to prepare the wires by taking off and tinning the insulation right now. Simply use your blade to remove the insulation from the silicone wire. You don’t need to go overboard; 3 to 4 millimeters (0.01 inch) should be adequate. Also, don’t forget to heat shrink the wire before soldering.
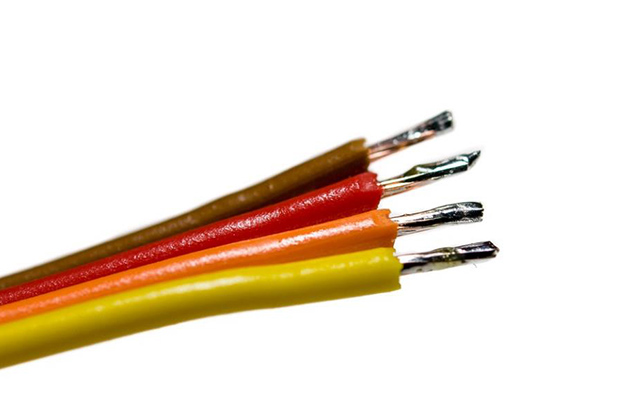
Time to start tinning. By contacting the wire with the lipo wire while holding the soldering iron, melt the solder onto the wire. To melt the solder on top of it, apply the soldering iron to it. Apply a little flux to the wire prior to tinning. The solder’s ability to stick is helped by flux. A lot of flux could harm the metal, so be careful not to use too much.
An individual wire needs to be tinned, connected to the connector, and heat shrunk. next wire up is then. This will lessen the chance of an unintentional short circuit.
Solder To The Connector
After that, you’ll need to solder the wire to the connector. The connector must first be tinned. Check the polarity to make sure you’re soldering it correctly.
Put the connector in a plier after wrapping it with a rubber band to keep the connection straight.
Repeat with the second wire. If you keep the connector horizontal rather than vertical, it will be much simpler. When people see a connector, they frequently think they need to push the wire completely into a soldering iron. Simply soldering it to the exposed area is all that is required. If the quality of the tinning and the soldering are sufficient, the bond should be very strong.
Tips For Soldering Wires To Connectors
Crossing The Streams
There is only one way to twist wires together for soldering—a horizontal twist that results in a continuous length of wire. Don’t connect your devices with a pigtail—doing so will result in issues—where the wires are bent at a 90-degree angle to the rest of the wire.
Heat Don’t Lie
If you can see the wire strands within the solder itself, your solder joint is hot enough. Always insert the soldering iron or gun UNDER the wires before adding the solder to the top of the wire. Since solder is drawn to heat and melts there, it is drawn through the wires and joins each strand with solder. Solder is drawn to heat.
All Scream For Tubing
Because a soldered connection is a live circuit, you cannot simply leave it exposed. Although most people don’t use high-quality tape, electrical tape is acceptable. Heat shrink tubing is the best option for covering soldered wires, and it needs to be put in place PRIOR to the soldering being completed. Simply slide the tubing over the joint once the solder has cooled, then shrink it with a lighter or heat source. Just make sure the wire is the appropriate size.
There is only one brand and model of electrical tape you should use, and sometimes you can’t help it. It’s either 3M Super 33 or Super 88. Both of these are serious matters. $1-per roll tape is junk, and absolutely should never be used on electrical connections unless it is an emergency repair. Super 33 and Super 88 cost between $4 and $5 per roll, and they adhere to the connections, seal them, and don’t come off after four months. The professional industry uses Super 33 as the standard, so you should always have a roll on hand in your toolbox. The cheap stuff is primarily used to bundle wires and to hold a towel over your hand when you accidentally cut off a finger.
These suggestions will help ensure that your electrical repairs last forever and give you years of worry-free service. If you don’t, you’ll probably find yourself back under the dash, standing in your best origami-folded human pose, wishing you had just soldered it in the first place.
The Easy Way To Solder Wires To Connectors
- Cut a wire to a length of 2 cm to begin, and only remove 1 mm or less of insulation from the ends. You should slightly flatten one end of the wire so you can solder it to the connector’s “tab.” When you pull the wire away from being flattened, don’t worry if there is a small piece of wire at the tip: we will take care of it later with some plier work;
- Attach your flux or flux pen (if using lead-free solder), and heat up both surfaces (the tab on the connector and the flattened portion of your wire) for around 2 seconds before applying the solder. The heat will make the solder flow easily;
- After you’ve applied the time the appropriate amount of solder, remove your iron’s tip from both surfaces and let it cool down for a few seconds while still in contact with them (this is to avoid having large drops of melted alloy falling on the tab);
- Then, take some side cutters or diagonal pliers and simply pull away excess wire, without forgetting about that little flattened bit we left at the beginning;
- Finally, give some form to your final product so it’ll hold its shape when inserted into slots;
Banana Plug Soldering Techniques
Banana plugs are simpler to solder than two-connection audio 3.5mm or 1/4″ plugs. There is only one connection, and there is no screened cable to strip. Utilize the helping hand to hold the wire as you tin it while you strip and tin the cable.
The banana plug’s back is only a half-cylinder, as you can see in the picture. I’m not going to bother to tin this. You end up filling it with solder even though it’s already bright and clean, and that’s where the cable should go.
Simply hold the wire in the banana plug’s back half cylinder with the helping hand. After that, soldering the banana plug’s back is just a simple task of heating it up. While it cools, the helping hand keeps everything still. The solder joint is then flawless.
assembling a banana socket with solder.
You won’t melt the plastic if you remove it by unscrewing the nut on the back.
Again, it makes soldering much easier if you use the helping hand to hold the tinned wire in place.
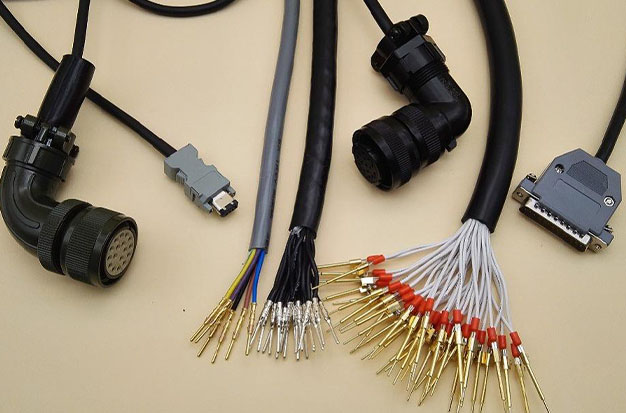
A spade connector enables the same operation.
IEC mains socket in this location is the same. Having the cable along the terminal rather than through the hole will result in a better solder joint, as can be seen in the image. By doing it this way, the cable will have more contact space with the terminal. Heat shrink sleeving can be slid over the joint more easily and the joint looks cleaner as a result.
Conclusion
The one thing to note is how much simpler it is with a helping hand to solder the majority of the plug, socket, and terminal types. While you make the joint and while it cools down, everything is held in place without being moved.
I’ve tried a variety of techniques to try to hold it myself while soldering, and I won’t be using them again.